How to install using the Suction Cup.
- Clean the Window before installation. Remove dirt and
oil slick with a towel and detergent, and then dry
completely.
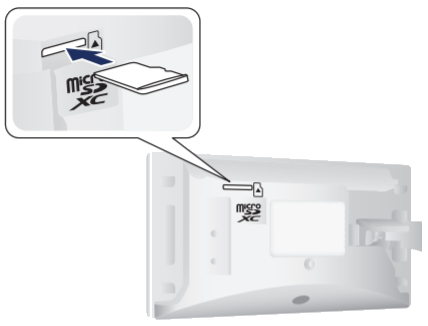
- Insert a microSD car (not included).
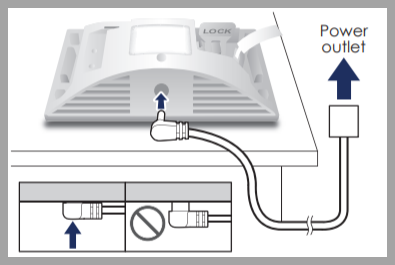
- Insert the AC adaptor connecter.
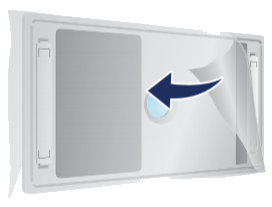
- Remove the transparent film (window side).
- Place the camera on the window. Press the
entire camera firmly against the window for 3
seconds.
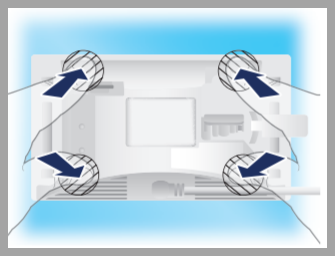
- While pressing the center, pull up the LOCK lever to
secure the camera.
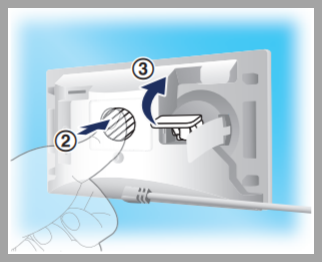
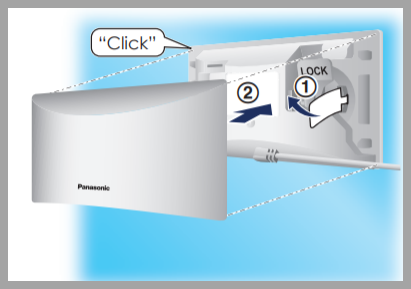
- Tuck removal tab inside and then attach the cover
until you hear a "Click".
Suction cup installation video.
Installation Notes
- When installing with suction cup to avoid periodically remove and reattached, this will prevent the cup from losing suction which may cause the camera to fall.
- Reattach suction cup when notification pops up (3 months).
- If the window becomes warm after being exposed to direct sunlight there is less suction and is easier for the camera to fall off the window.
How to install using the Double Sided tape.
The included double-sided tapes are designed to be used on standard window glass surfaces. If your window contains materials such as tinted film, we recommend you consult with the window manufacturer prior to use to avoid window damage.
- Clean the Window before installation. Remove dirt and
oil slick with a towel and detergent, and then dry
completely.
- Insert a microSD car (not included).

- Insert the AC adaptor connecter.

- Remove the transparent film (window side).

- Pull up the LOCK lever.
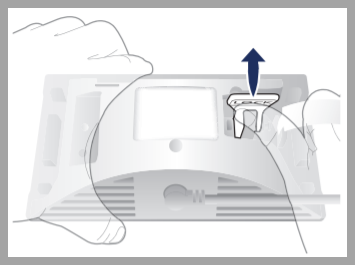
- Remove the back cover. The remove one set of the
double-sided tape from the inside of the back cover.
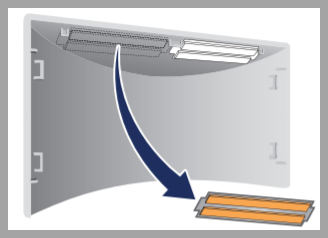
- Attach the double-sided tape.
- Attach the double-sided tape to the left and
right side of the camera. Hold down the entire tape
firmly.
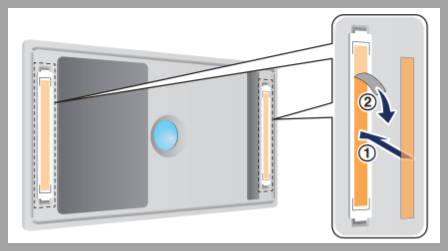
- Take the release paper off the tape.
- Attach the double-sided tape to the left and
right side of the camera. Hold down the entire tape
firmly.
- Place the camera on the window and press firmly for
30 seconds.
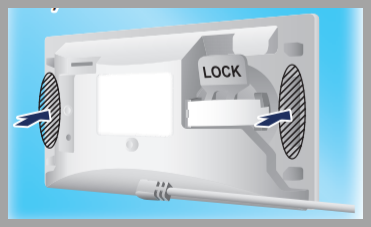
- Tuck removal tab inside and then attach the
cover.

Double-sided tape installation video.
Installation Notes
- The double-sided tape has an average bonding life of 2 years and requires replacement of the tape to ensure the proper attachment surface connection.
- We recommend using double-sided tape to secure the camera to the window when you are away from the home for more than 3 months or when you do not want to reattach the camera with the camera periodically.
- Double-sided tape is not reusable.
- Replacement tape is available through our parts distributors. Use only Panasonic double-sided tape. This tape is a special heat resistant material. Do not use tape from a DIY store.
- If the window becomes warm after being exposed to direct sunlight there is less suction and is easier for the camera to fall off the window.
- Remove the camera off the window when opening or closing the window.
